Wednesday, September 17, 2014

How to Organize Your Closet on the Cheap

Anybody can buy one of those fancy closet organizers for a few hundred or a few thousand dollars, but having a clean, functional and organized closet on the cheap is another story all together.


You need to be a lot more creative, use your limited space more efficiently, and develop a sustainable system (and I never want to harp on things, but I will anyway - SUSTAINABLE means that it will not look great for this weekend and by next weekend look like a tsunami came through and you're right back where you started).

The process of organizing is easier than you think, and having a great system means that you will save time and hassle every single day - you might get to sleep in an extra 10 minutes, or you might just start your day in a state of ease and calm instead of frantically searching for every aspect of your outfit - Imagine the possibilities!!


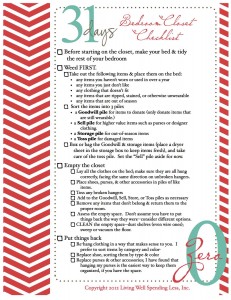
Get your Closet Checklist from Living Well Spending Less HERE
Let's take it step by step:

1) Purge Purge Purge RUTHLESSLY
 
Take out: 

  • anything that doesn't belong in that closet, like books, sport equipment, photo albums, etc.
  •  any items you haven't worn or used in over a year
  • any items you just don't like
  • any clothing that doesn't fit
  • any items that are ripped, stained, or otherwise unwearable
  • any items that are out of season (if you have another space to store these, that's the best option, but if not, we'll talk about it later in this blog)
Really commit to being ruthless here. You should be trying to get down to about 40 clothing items on hangers. Calm down. Yes, 40. If you only keep the clothes you really love, you'll look awesome all the time. You deserve no less than looking awesome all the time.

    Sort the items into 4 piles
  • a Goodwill pile for items to donate (only donate items that are still wearable.)
  • a Sell pile for higher value items such as purses or designer clothing.
  • a Storage pile for out-of-season items
  • a Toss pile for damaged items (you may just want to bring in the trashcan and save a step)

 
Plan and Follow Through
Box or bag the Goodwill & storage items (place a dryer sheet in the storage box to keep items  
   fresh), and take care of the toss pile.

Set the “Sell” pile aside for now, but make a concrete plan of HOW you are going to sell them (garage sale, consignment shop, craigslist, ebay, etc). Learn more HERE.

If you have clothes that you would wear once they are mended or skinny clothes that you want to get back into one day soon, you can keep them IF you commit right now to sewing them or starting that new workout routine this week. If not, outa here.

2) Create Your Blank Slate

  • Take EVERYTHING out of your closet, putting like items together so that once you purge you'll know exactly how much needs to fit back into your newly organized closet. 
  • CLEAN the empty space--dust shelves (even wire ones); sweep or vacuum the floor.
  • If you don't already have it, now would be a great time to put a light in your closet. Create an environment that abhors dark little corners stuffed with junk. Something simple and cheap could be sufficient.


3) Create YOUR Perfect System 

Now comes the fun part! You'll need to think about your process of choosing clothes and getting ready each morning. Here are steps, tips, and some great free and cheap ideas to maximize and organize:
So first assess the empty space. Don’t assume you have to put things back the way they were--consider different options.

Clothes
Think about your process for choosing your outfit each day. Which items will you need to access the most frequently?

You should know:
Fold it: Delicate garments, especially those with beading
Fold it: Cashmere (anything)
Hang it: Dresses
Hang it: Skirts
Hang it: Blouses and dress shirts
Hang it: Pants

Re-hang clothing in a way that makes sense to you.
Put all your dresses together, all your blouses together, all your jeans together.

Within each category, you can further organize by season, color, or type, depending on your space and dressing process.


Here are some ways to maximize your clothing space:

Tension Rods are cheap and can
be hung almost anywhere


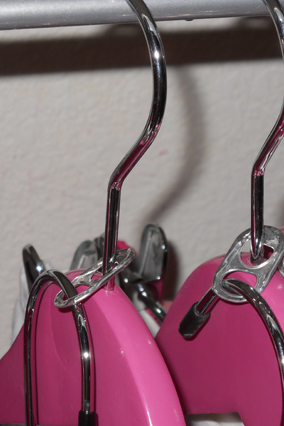
Using old soda tabs can double your hanging space for free!

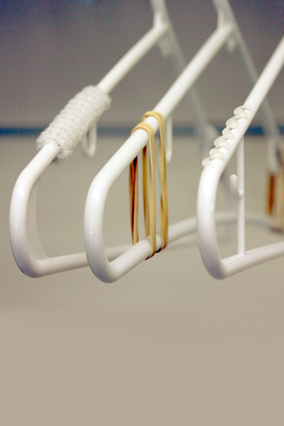
You could spend $30 on a set of felt hangers OR:  Take a few pipe cleaners; wrap one around each end of a hanger, starting slightly after where the neckline of the clothing would sit. Rubber bands work, as well.  But the best option is to use a hot glue gun to make a zigzag pattern along the top of the hanger to create a grip, which is just as effective but the clear glue is less noticeable.

Use Rope and a wooden dowel rod
to double your hanging space


Space bags are about $4 and a great way to
store out-of-season clothes
Everything Else


OR
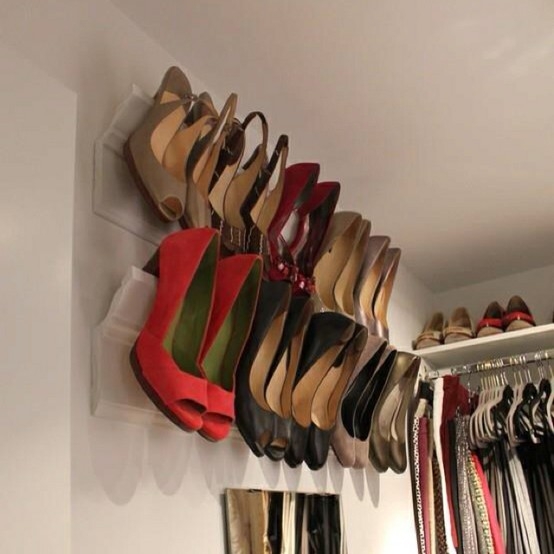
Attach crown molding onto your wall 
as a perfect high-heeled shoe rack
Simple metal utility hooks are a great option for purses
Awkward items like suitcases can be stored on wall hooks

Cheap plastic shower curtain rings 
and a hanger can be a great scarf 
storage option

This $5 Towel Rack is another great option for your scarves

Hanging a Peg board inside your door creates an
inexpensive mini-dressing station
An old kitchen utensil rack is a great place to hang belts, ties, necklaces, etc

Plastic drawers are great for undergarments and
smaller items and are worth the investment


Be sure to store season items away so that it doesn't clutter your closet and mess up your flow. Galoshes, winter hats, mittens and the like can all be stored away in under-the-bed bins during the spring and summer, and the same goes for beach towels and swimsuits in fall and winter.

4) You're Organized, So Now What? 

  • Practice Careful Procurement - Once you've managed to pare your closet down to the bare minimum and have kept the pieces you truly love, keep it that way!  When buying something new, choose quality over quantity.  Resist the urge to buy something simply because it is on sale.  You are always better off buying ONE piece that you love than TEN items that are just okay. 
  • Re-Evaluate Regularly It is a good idea to re-assess, re-sort, and re-evaluate your closet every few months.  Once a season double check to make sure that your items are still in good shape, that they still fit, and that they are free of stains & holes.  If necessary, pull seasonal items out of storage to add to the rotation, and store any items that are no longer seasonally appropriate.

Good Luck!


Wednesday, September 10, 2014

Stuff It - Great DIY Pillow Ideas to Complete Any Room

Pillows add color, pattern and texture to a room. They soften hard edges of furniture and create a much warmer space. They can be elegant or just plain fun.

Since Aiva's all about actual, applicable information in our blogs, we're going to break this down into three areas of pillow-making success:

  1. General Color Schemes for Your Pillows Based on Your Room Palette
  2. A Step-By-Step Guide to Making Pillows in General
  3. Some Cute and Unique DIY Pillow Ideas to be Applied with the Wisdom Gained in Steps 1 and 2
And of course, there will be lots of pictures because that's how we roll.

1. A Pop of Color

Rich and Bold
Gold adds interest and shine if you are using darker and saturated colors
Natural
Green, yellow and brown decorative pillows brighten up a solid tan couch with a natural — but lively — color palette.
Shades of Vanilla

If your tend to stick to very light neutrals (whites, creams, tans, etc), give it a splash of bright colors with a rainbow of pillows.
Pastels
These bright turquoise pillows are gorgeous against light and pastel furnishings

Black and White
Red (or another bright, solid color) looks great against the black and white backdrop

Materials and Tools:
pillow form
fabric
trim (if desired)
matching thread
scissors
straight pins
sewing machine
Steps:
2. To create the front of the pillow cover, cut one piece of fabric the same size as the pillow form (If you plan on being able to wash it, please pre-shrink your fabric before you do this). Because the fabric should fit snugly over the pillow form, this measurement includes a half-inch seam allowance. If the pillow form is very firm, it may be necessary to add an inch to both the length and the width of the pillow.
3. To create the back of the pillow cover, cut one piece of fabric the same width as the front piece of the pillow and 4 inches longer than the length of the pillow front. Fold the piece in half lengthwise and cut along the fold. Turn this edge, which measures the same as the width of the pillow, under a quarter-inch and press. So that no raw edges will be exposed, turn under again and stitch. Repeat with the other back piece. (If the fabric you've chosen is very thick or stiff, you may want to cut the back piece of fabric exactly the same size as the front. This pillow cover will not be easily removed, as it will be slip-stitched closed.)
Or a pillow
4. If you're using a trim, attach it in this manner: With raw edges together and beginning in the middle of a side, place the trim so that 1 inch extends beyond the seam allowance and is against the right side of the pillow front. Pin in place. When the ends of the trim meet, the second end should also be extended 1 inch into the seam allowance. Sewing very closely to the trim, use your zipper foot to sew the trim in place.
5. Lay down the pillow top with the trim side up. With right sides together, lay half the pillow back on the pillow front and pin in place. Pin the other half of the pillow back in place. The two pillow backs will overlap each other by 1½ inches. Using the stitching line that attached the trim as a guide, stitch the back and the front together. (If the back of your pillow is a single piece of fabric, sew as directed, but leave an opening into which your pillow form can be inserted.) Trim the excess fabric from the corners.
6. Turn the pillow cover right side out and insert the pillow form. Slip-stitch closed if necessary.

You Can Do It, You Can Do It Yourself
As I'm sure you know, there are millions of pillow ideas out there, but here are a few to get your wheels turning:
On Classy Clutter

On Melly Sews

On Better Homes and Gardens
I could go on and on, but instead, check out more ideas on Pinterest and remember, we'd love to see your great DIY projects, so feel free to comment.
Thanks to HGTV for some of this content.

Wednesday, September 3, 2014

Shelf Life - The Why's and How-To's of Great Shelving

We all have stuff. Stuff that represents a time in our past. Stuff that we use several times a day. Pretty stuff. Quirky stuff. Sentimental stuff. Let's talk about stuff (baby) - and specifically, what you're going to do with it.

There are as many storage ideas out there as you have items you need to store, so let's break it down.

Why Use Shelves? 


1. Get Vertical 
  • Utilizing vertical space is the most efficient way to keep you from tripping over stuff in the middle of the night, keep a room feeling open, and manage urban sprawl (I'm talking to you, giant suburban shopping centers). 
  • Shelves can be used in conjunction with other types of storage (drawers, bins, baskets, etc) to really maximize a space, especially if you don't want to display each item (ie: your kid's 80 billion Legos - see: things you definitely don't want to step on in the middle of the night)

2. YOU All Over
  • Pictures and framed art are great, but the world is three-dimensional. Throughout the course of your life, you have picked up some great souvenirs, mementos and gifts that really show who you are. This is your home - it should reflect your personality, interests and your snarky jokes from college. 

  • Not only can you display your personality ON the shelves, you can display your personality WITH the shelves. More on that below.
So... You like to travel and read, huh? Cool.


How To Use Shelves

We're going to keep things simple here and say that most shelves fit into 2 main categories: 

1. Wall Shelves - They hang on a wall in some form - includes Floating Shelves, Bracket Shelves, Hanging Shelves, etc. Here's what you need to know about that:

  • A good rule to follow when hanging shelves on a wall are that the shelf should be no wider than 1.3 x bracket's width and no wider than 1.2 x bracket's height.
  • Spacing brackets for a long shelf should be no more than 4 x shelf-breadth between each bracket - this holds true for normal materials used at home
  • Length and size of screws holding the shelf to the wall differ depending on the material of the wall. A good rule of thumb for concrete walls is that the screw should go into the wall at least at least as far as 1/10th the width of the shelf. But there are shelf systems where a brace is hung on the wall onto which brackets are attached without screws, so ask your supplier to give you advice if you're unsure. 
  • This should be obvious, but make sure that the material you use for the shelves is not too heavy for the wall (hanging cinder blocks from your drywall is a bad idea), and that it is strong enough to hold whatever you are putting on it. Glass shelves are for light things, wood can hold heavier things, etc.
  • Here are a bunch of cute DIY ideas for Wall Shelves:

Wallpapered Floating Shelves
"Book" Shelves

Leather Harness Hanging Bookshelf
Industrial Pipe Shelving
Wooden Pallet Bookshelves
Hanging Rope Shelves

Wine Crate Shelves
Magazine Holder Bookshelf
Colored Pencil and String Shelves on a Pegboard

2. Independent Shelves - Free-standing shelving systems, modular shelves 
  • As with wall shelves, basic physics applies
  • Hooray! More pictures!

Modular Shelving with storage boxes and binder clips
Ladder Shelves

Old TV Bookshelf


Don't just shelf these ideas! Make it happen :)